| Ypsilanti, Michigan Weather | |||||||||
 |
Civilian Weather Observation Program EW0985 |
 |
|||||||
|---|---|---|---|---|---|---|---|---|---|
| By: Jay Nugent - WB8TKL | - Weather Mast construction details - | Latest Update: Sept 15th, 2012 | |||||||
| Ypsilanti, Michigan Weather | |||||||||
| |
Civilian Weather Observation Program EW0985 |
|
|||||||
|---|---|---|---|---|---|---|---|---|---|
| By: Jay Nugent - WB8TKL | - Weather Mast construction details - | Latest Update: Sept 15th, 2012 | |||||||
|


|

The base of the mast consists of a 10-foot 4x4-inch timber sunk 4 feet into the ground. The soil was left undisturbed as much as possible by digging the smallest width/diameter hole as I could. The backfill was pounded into place as tightly as possible so that the mast will remain vertical and rigid and not shift over time. The dirt in the hole was wetted and re-pounded several times over the next few weeks to be certain it had settled and was hard and would not shift.

A second 10-foot length of 4x4 is added atop the first. For ease of erection and servicability, the mast can be tilted over by loosening the lower-most lag bolt and removing the middle and upper lags. Three 6-inch lag bolts and large washers provide enough strength in the joint for the height and load of the mast. The holes were pre-drilled to prevent cracking of the wood as the lags were turned into place.
Note that most big-box stores sell rather "wet" lumber - that is, it is not very well "cured", and will twist and bow as it ages. So select your lumber carefully!!! Within the first month, my mast twisted roughly 45-degrees as it aged. A "feature" was therefore added at the top of the wooden mast to correct for present and future alignment issues (we don't want the Wind Vane's reference to drift/twist over time).


Above the 4x4 wooden portion of the mast are two 10-foot sections of chain-link fencing poles (not fence posts, but the top railing of the fence). Mating the wooden and metal masts was accomplished by drilling out a close-fit hole using a Forstner Bit which drills a precise hole without wandering off sideways like many Twist drills will do. The hole is approximately 12-inches deep. To prevent splitting of the 4x4 under the fulcrum load of the metal mast, two stainless-steel screw straps were placed around the 4x4 for added support.

Atop the 4x4 wooden mast is a pipe flange. This flange privides additional protection of the wooden mast from splitting under the stresses of the metal mast. This flange has been modified by adding a "set screw" (1/4-20 cap head bolt) which is used to LOCK the metal mast in place, preventing it from rotating - thus preventing the Wind Vane from changing its heading reference. Since there is a "set screw" of sorts, future re-alignment can be made to correct for any additional twist that the wooden mast may exhibit as it ages.

The two sections of metal mast are kept from slipping or misaligning with the addition of two stainless cap-head bolts and fiber washer/nuts. We wanted this joint to remain secure so that the Wind Vane doesn't get out of calibration due to the masts slipping. This also adds some additional strength to the joint and hopefully removes some amount of "wobble".

...mast cap is used to keep rain/precipitation from running down the inside of the mast into the 4x4 wooden mast and causing any rot of the wood. It is best to keep the wood dry. NOTE: That mast should be painted or stained to further prevent the wood from aging.

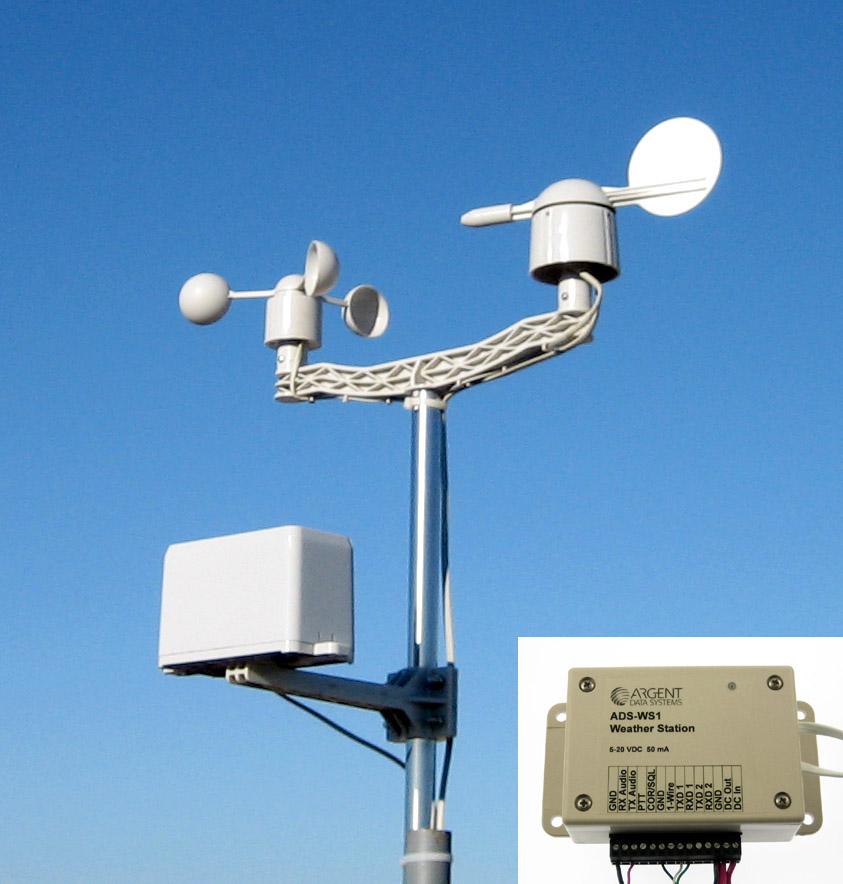
At the top of the metal mast is the instrument mount. Since there is a significant difference in the diameters of the main support mast and the much smaller mast provided by ADS with their weather instruments, a special mount needed to be fabricated. A 75-cent block of Delrin (plastic) from the local supplier was drilled using the same Forstner bit I had used to drill the hole in the wooden mast to fit the metal mast. This provided a concave "seat" that fit the O.D. of the metal mast, and was a good enough seat for the small ADS support pipe. Stainless hose clamps were again used to fasten all the pieces together.

...lightning suppression....


These pages are maintained by:
jjn@nuge.com
Copyright © 2012 John (Jay) Nugent - WB8TKL
All Rights Reserved. All other Copyrights and
Trademarks are property of their respective owners.
