| Ypsilanti, Michigan Weather | |||||||||
 |
Civilian Weather Observation Program EW0985 |
 |
|||||||
|---|---|---|---|---|---|---|---|---|---|
| By: Jay Nugent - WB8TKL | - Gill Box construction details - | Latest Update: Sept 24th, 2012 | |||||||
| Ypsilanti, Michigan Weather | |||||||||
| |
Civilian Weather Observation Program EW0985 |
|
|||||||
|---|---|---|---|---|---|---|---|---|---|
| By: Jay Nugent - WB8TKL | - Gill Box construction details - | Latest Update: Sept 24th, 2012 | |||||||
|
|


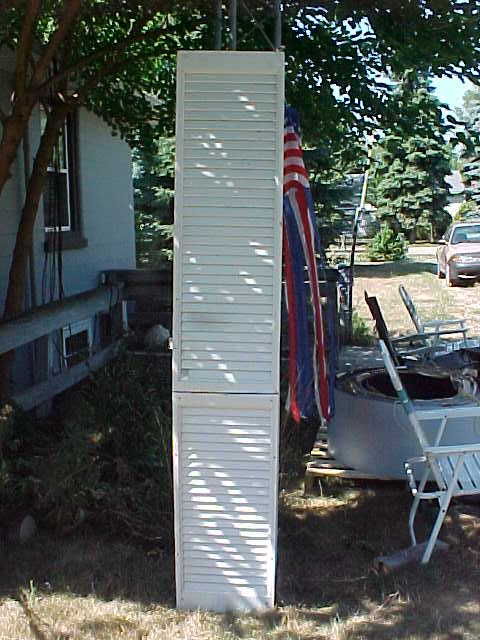
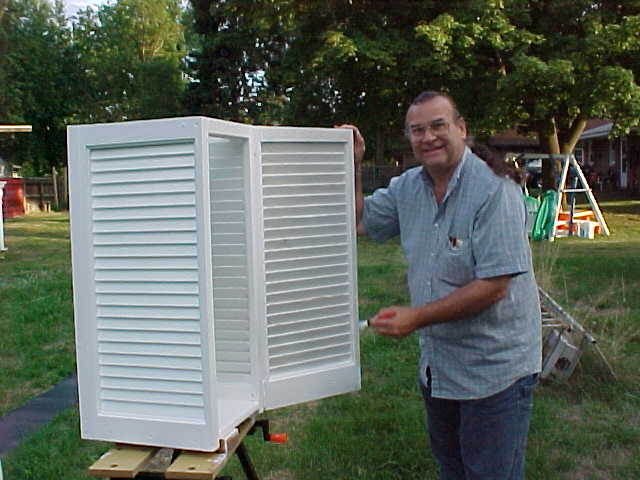
There are many Gill box designs, each with their respective benefits and drawbacks. Larger may be better than smaller, but build what you can with what you have available or can afford.

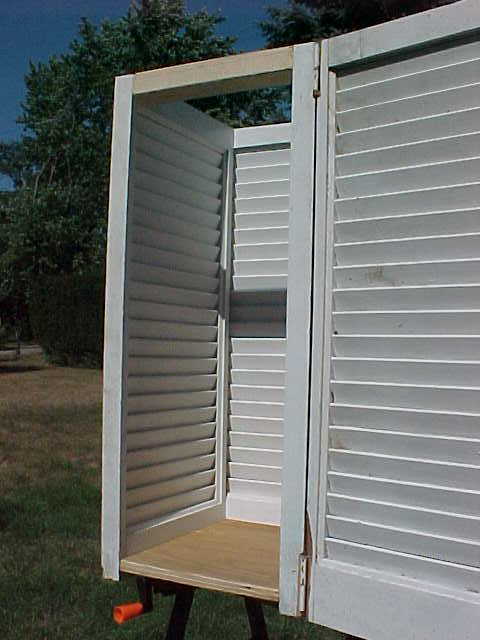
To prevent any possible water damage to the bottom board (base) of the enclosure, the base is recessed about 5/8ths of an inch. This should help to prevent rain water from wicking up underneath the edges of the box and soaking the wooden base. Water should now simply drip off the bottom of the lovered panels.
Three 2-1/2 inch decking screws were used to attach both the Left and Right side panels to the base. Holes were pre-drilled to prevent any splitting of the wood. The rear panel was then fastened directly to the Left and Right side panels using 2-inch decking screws (the shorter screws were needed to prevent the screw from breaking through to the other side of the wood).

The goal is to have a draft of air come IN through the louvers, travel up the inside of the box, then exit easily OUT through the top. So the top MUST be open to air flow. Later, we will show how the lid or top was constructed.
The two louvered sides need to be secured in some way, so a 1-1/2" X 2-1/2" board is attached between the top corners of the Left and Right side louvers. This completes a rigid rectangle in all 3 dimentions.
The hinges that once held the Bi-Fold louvered doors together were re-purposed to hang the front access door. A bevel of wood was removed from both the case and the the door to make enough clearance for the hinge pin so that the door would not bind when opened. When we get to the painting stage, these areas will be cleaned up a bit and protected from water/weather.

A view of the completed Gill box, sans the lid/top and mounting bracket...

My sweetheart, Mary Anne (W8VWY), said that it looked like I was having just WAY too much fun painting. And I was!!! So she ran and got the camera!

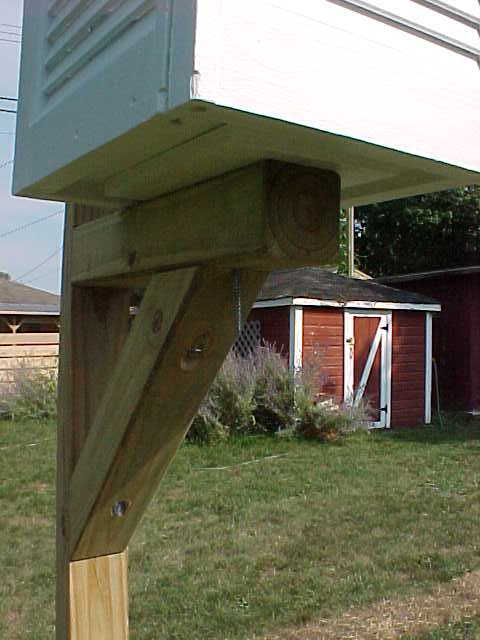
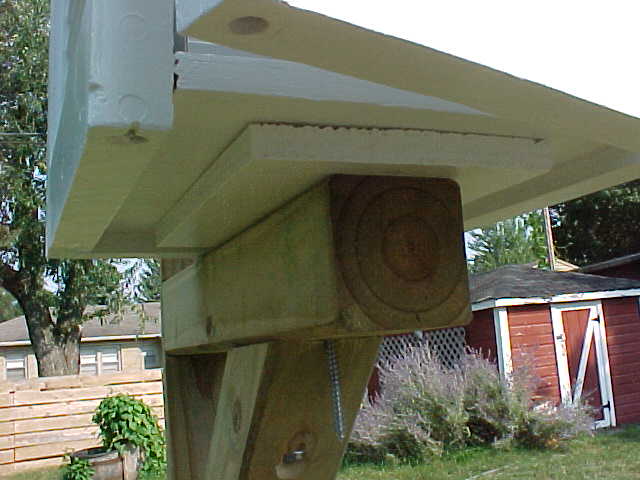
The Gill Box needs as much airflow as possible, so it is NOT mounted too close to the 4x4 mast. I chose to mount mine about 6 inches away from the mast. The mount is comprised of a 4x4 inch horizontal arm about 22 inches in length. I added a support at a 45-degree angle just because it looked good and added a bit more support.
Since the bottom of the Gill box is recessed (to allow rain to drip off the edge and not wick or soak back into the base) I added a scrap of plywood under the base. This allowed the horizontal 4x4 support arm to not interfere with the lower edges of the Gill box. The scrap is screwed onto the 4x4 horizontal arm with four countersunk screws. The Gill box now rests atop this with a fairly large amount of surface area for support.
Pressure treated 4x4 lumber has a tendancy to twist and bow as it dries. I wanted the Gill box to remain "square" with other items in the back yard - call me "particular" (grin). To accomplish this, I mounted the Gill box onto the horizontal support arm with a single bolt down through the center of the box. The box can now be re-aligned from time to time as needed.
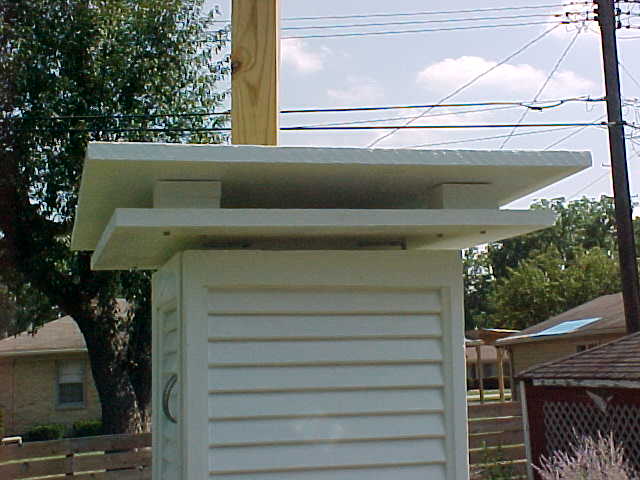
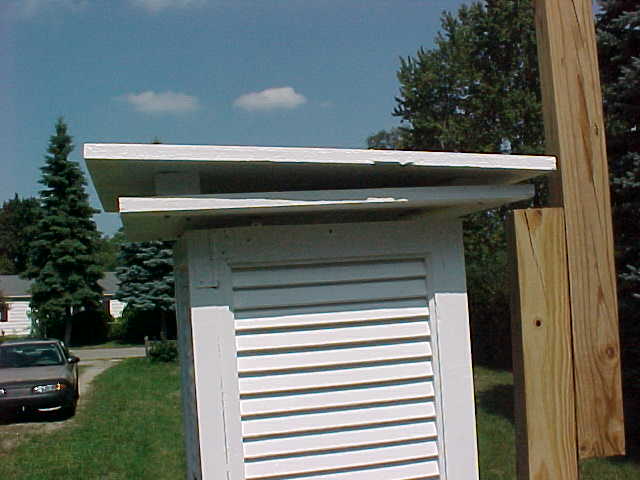
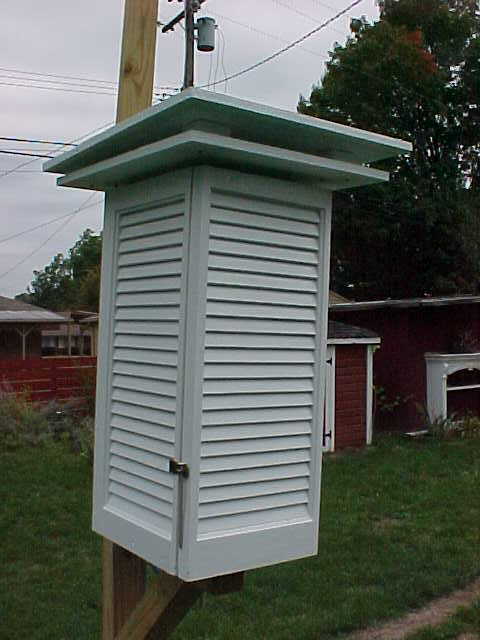
One of the most important parts of a Gill box is its lid. The lid must be designed such that it prevents water/snow from getting on the instruments, but more importantly it must prevent heat from sunlight from entering the box. A single layer of wood is NOT sufficient! It will heat up from solar radiation, and then conduct and radiate that heat into the Gill box where the instruments will be effected. A better design is to have two roofs so that the first roof receives the solar radiation, while the space between the two roofs allows that heat to be blown away easily by a light breeze. The second roof then isolates the instruments from any heat that had been created.
In my design, the roof has a 5-3/4 inch overhang on all four sides - only because the board I was using was already cut to that length. This dimension is not critical, we just needed the rain/snow will drip off and not run down the sides of the louvers.
The bottom roof is mounted on angle brackets attached to the inside of the Gill box, with a slight tilt toward the rear. The top roof has more of a tilt to the rear by placing one 3/4" block thickness in the rear, while two 3/4" wooden blocks (atop one another) are used at the front. In this way any rain or snow will drip off away from the front access door. No one wants to stand in from of a Gill box on a wet or stormy night performing a little maintenace and have the weather dripping on you the whole time :(
Also note that the lower roof must be mounted high enought to allow air to escape through the top of the box. Remember, air comes into the box through the louvers and typically travels through and exits through the louvers on the opposite side, or travels upward and is carried out the top of the box.
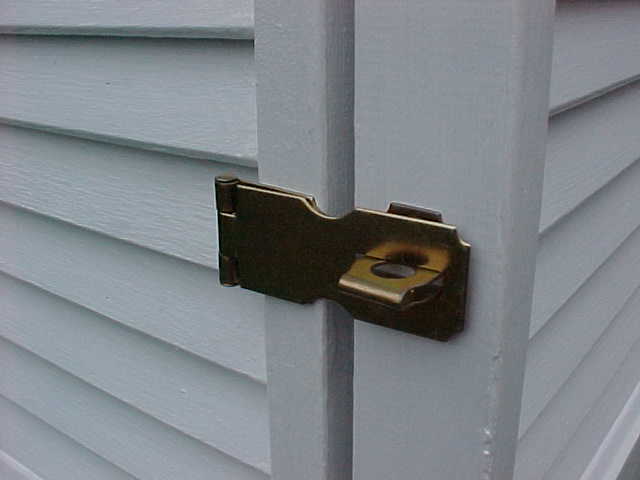
A simple latch is used to keep the door closed. It *can* be locked if need be. I just use a thick nail (rain gutter nail) for this purpose.
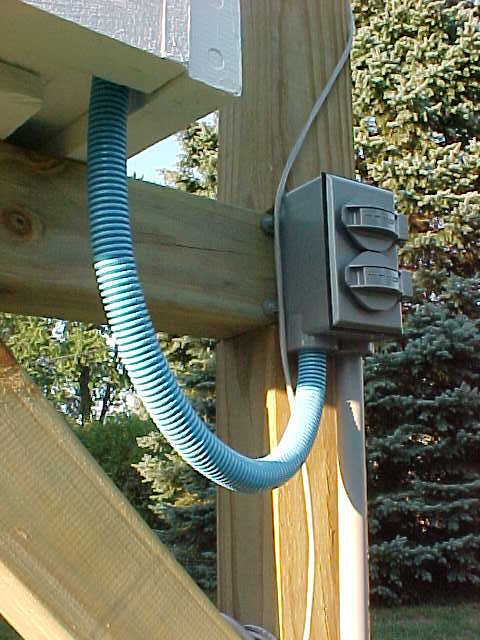

A bundle of power, CAT5, and alarm cables are brought into the case through a PVC pipe and a short piece of flex conduit. It is then clamped in place with a conduit clamp.
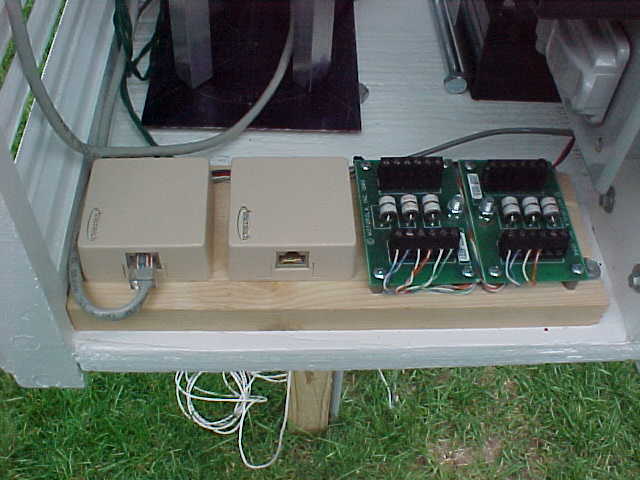
Cable management is achieved by terminating all of these cables into lightning suppressors. They then are fed to RJ45 jacks. My personal preference was to use RJ jacks that have screw terminals rather than type-110 punch down connections. I feel these will survive moist/damp/humid conditions better than the 110 punch downs.
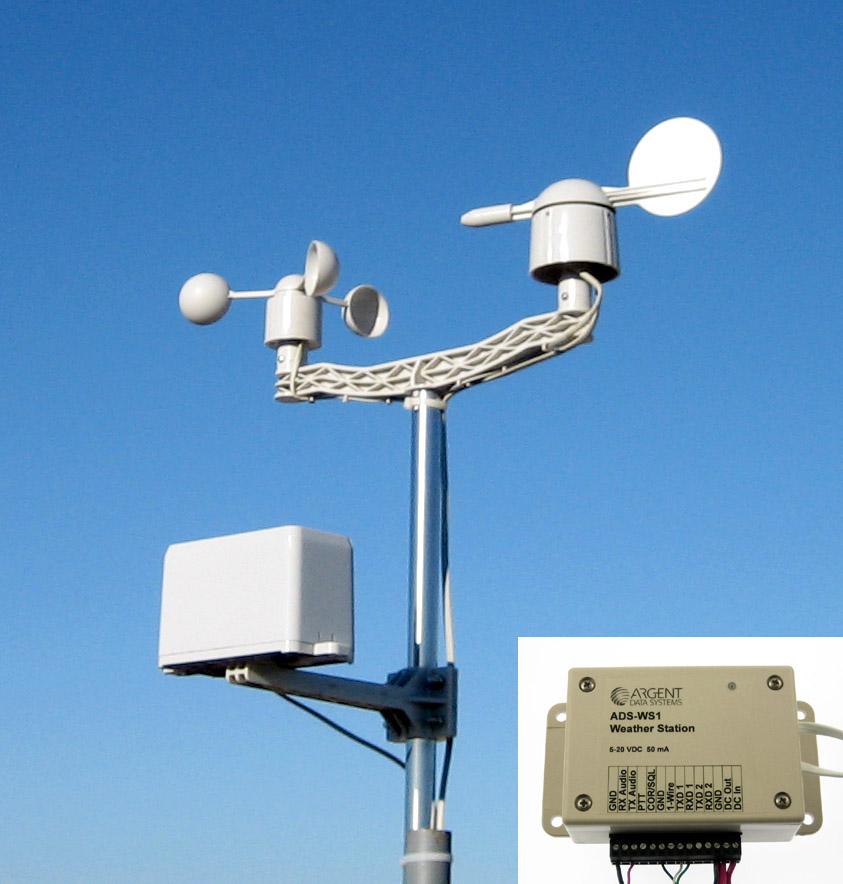
The RJ jack on the left is for the RS-232 (2400 baud) feed to/from the Argent Data Systems WS1 as well as the 2 wires needed for the Ademco type #39 magnetic alarm contact. While the RJ jack on the right will be used for a future Ethernet.
The 12-volt D.C. power feed will be terminated into set of toggle switches used to distribute power to the respective instruments such as: WS1, aspirator, solar radiation, geiger counter, and Sferic. It will also feed a simple battery maintenance charger to maintain the 12-volt SLA battery inside the Gill box.


These pages are maintained by:
jjn@nuge.com
Copyright © 2012 John (Jay) Nugent - WB8TKL
All Rights Reserved. All other Copyrights and
Trademarks are property of their respective owners.
